Baking a Raspberry Pi
I have not used this process on the Pi 5. But I have used it on Pi 0s, 3s, and 4s since the release of Bookworm. I can think of no reason why it would not work.
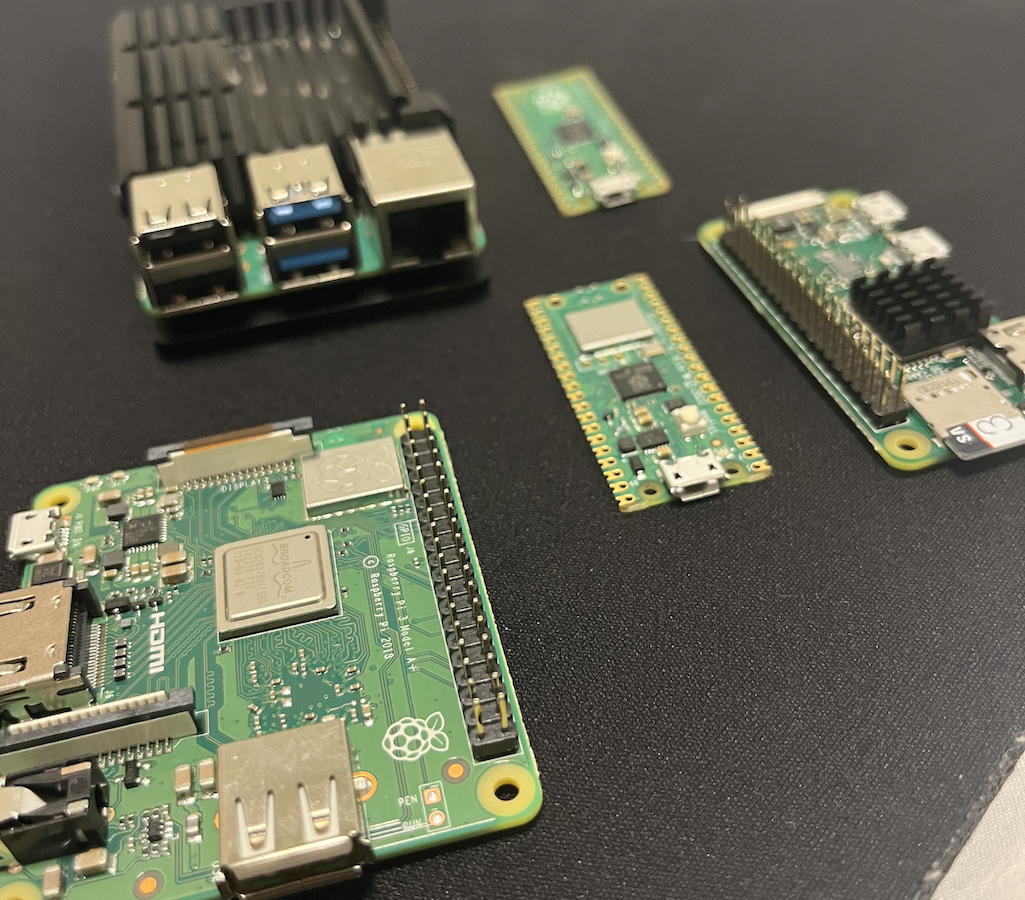
I discovered Raspberry Pi just after the launch of the Raspberry Pi 4. I was amazed at the size and power of this little single board computer. Immediately I had plans to place one everywhere, even if just to use as a simple terminal. My first Pi started by sitting on the desk as a simple linux box. Now I have an entire collection.
Pretty soon I started some simple projects by controlling LEDs with GPIO. Then I built a Raspberry Pi based Home Assistant server, followed by a Pi-hole. Now I have one running Klipper on my 3D printer.
Although the Pi is a simple single board computer, I put together a guide outlining the basic start up process I follow anytime I bake a new Pi.
Flashing the Operating System
The fastest way to get a Raspberry Pi up and running is by using Raspberry Pi Imager to flash an approved OS on to your SD card. I usually stick with Raspberry Pi OS or Raspberry Pi OS Lite for my Pi based projects. From there I can install any other software required without the bloat of the “full” version. The table below provides a quick reference regarding 32 and 64 bit compatible devices.
| 32-bit Devices | 64-bit Devices |
|---|---|
| Raspberry Pi Zero | Raspberry Pi 3 |
| Raspberry Pi 1 | Raspberry Pi 4 |
| Raspberry Pi 2 | Raspberry Pi Zero 2 |
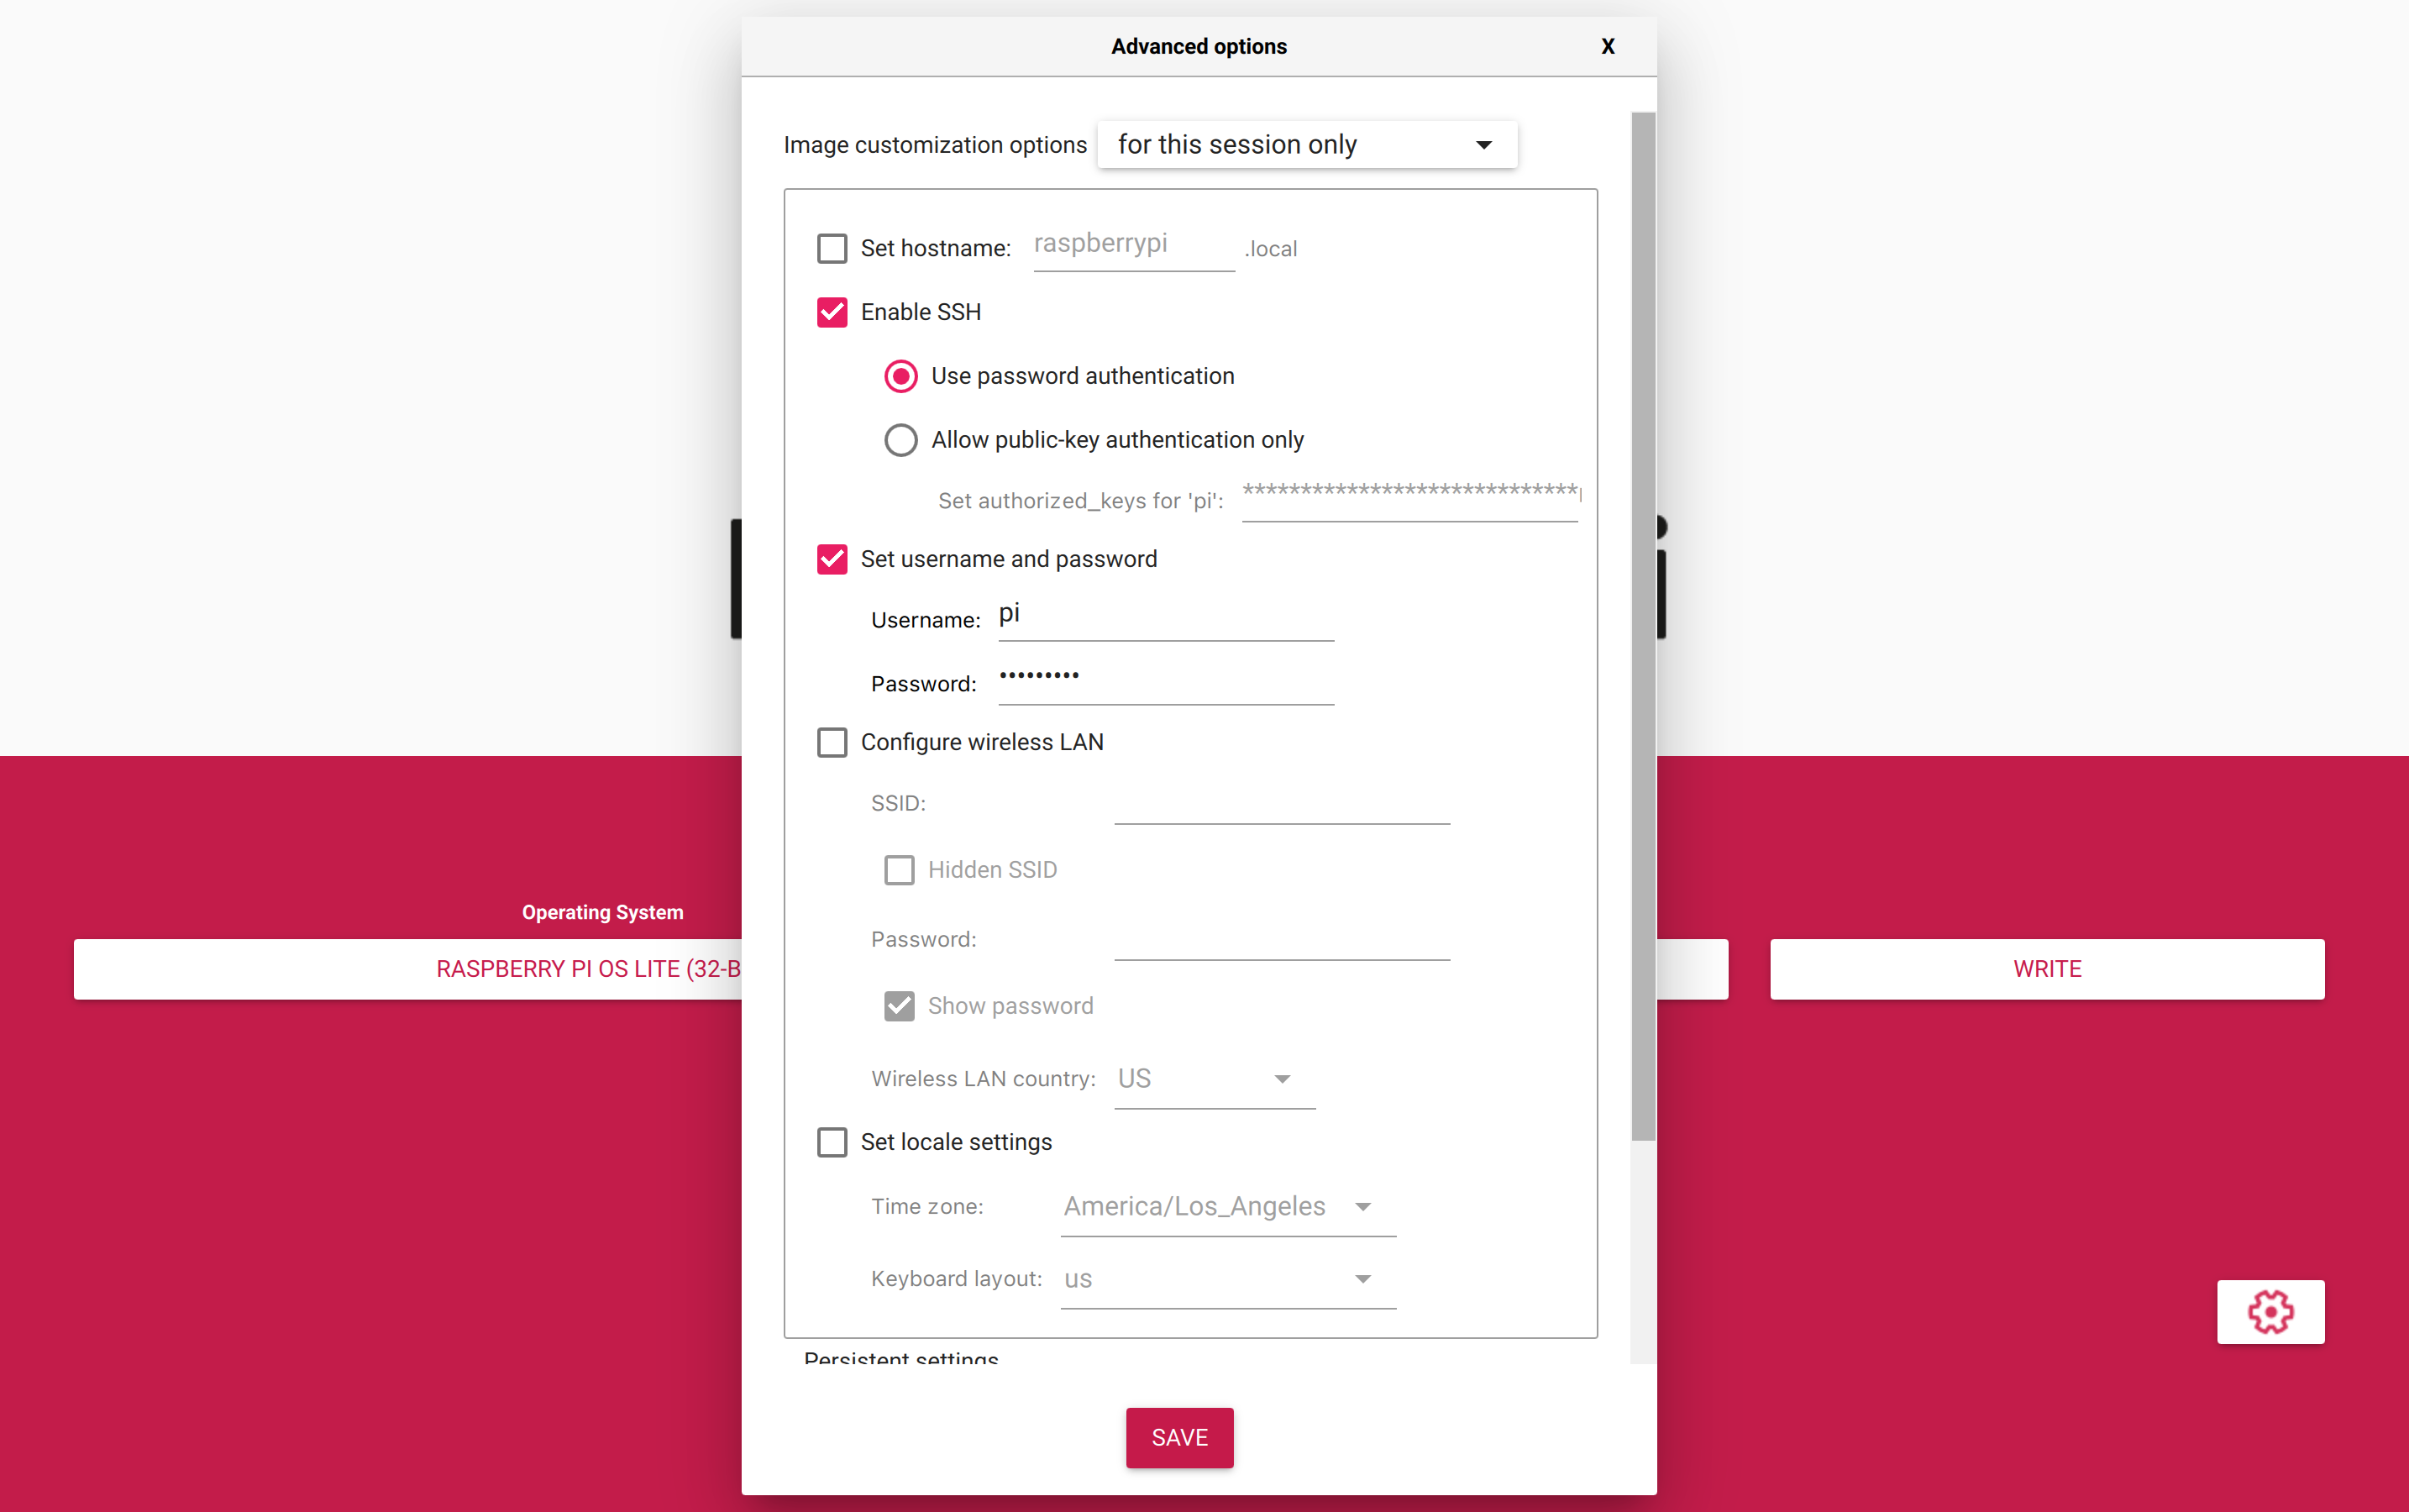
The official imager also allows some advanced options to be configured early on. Once you’ve selected the OS and storage device click the gear icon in the lower right corner of the imager. From here you can set a custom hostname, enable SSH access, set the username/password, and update you locale settings. If my Pi will connect to a network, I always enable SSH and if it will be a wireless install, I’ll input my WiFi settings. With these settings complete, you can write the image.
After the SD card is flashed, place it in the Pi, and boot it up. You should now have a freshly baked Raspberry Pi ready for any project.
For reference, Raspberry Pi uses the following defaults:
- Hostname:
raspberrypi - User:
pi - Password:
raspberry
SSH Access
SSH or Secure Shell allows secured access to a remote machine via command line. It also opens up the ability to copy and transfer files via SCP and SFTP. This is an essential tool if you will be managing a Raspberry Pi project remotely. Although this guide is written as it applies to a Raspberry Pi, most of the steps will translate to any linux machine.
First we need to determine the IP address of the Raspberry Pi. In a headless setup I usually check my router’s list of connected devices. If you want to check it locally run the hostname -I command in the terminal.
This is good time to discuss static IP addresses. A static IP ensures the router always uses the same IP address for a specified device. This is usually done via your router’s DHCP reservation settings and varies slightly by manufacturer or network infrastructure. I recommend setting a static IP for your Raspberry Pi so it can always be found in the same place on your network. Otherwise, the reliability of your project will likely suffer.
With the IP address of the Pi known and SSH enabled during the flashing process, we can access the terminal of the Pi from an SSH client on a remote network device. Windows and MacOS natively support SSH from their command lines. Alternatively an SSH client can be used. PuTTY is a popular Windows client. I personally use Termius on my Mac and iPhone.
Moving forward I will be using the default username pi, password raspberry, and an example IP address of 192.168.3.14 in the examples provided. Make sure to use your real username, password, and IP address when needed.
Start by accessing the Pi.
1
ssh pi@192.168.3.14
You will then be prompted to input your password. In this example the default is raspberry.
For those newer to linux, passwords are not echoed in the terminal so don’t be alarmed when it appeared there was no input.
At this point you should have successfully accessed the command line remotely and see the below output. You can run any command as if you were physically connected to the Raspberry Pi.
1
2
3
4
5
6
7
8
9
10
11
makermedic@macbook ~ % ssh pi@192.168.3.14
Linux 192.168.3.14 6.1.21+ #1642 Mon Apr  3 17:19:14 BST 2023 armv6l

The programs included with the Debian GNU/Linux system are free software;
the exact distribution terms for each program are described in the
individual files in /usr/share/doc/*/copyright.

Debian GNU/Linux comes with ABSOLUTELY NO WARRANTY, to the extent
permitted by applicable law.
Last login: Thu Aug 17 12:00:31 2023 from me@myMac
pi@192.168.3.14:~ $
SSH Security
So far we have enabled SSH access via password. Although secure, it is not as secure as using key based authentication. Using a properly configured key will allow password free access to only authorized devices.
To learn more about SSH and the various algorithms available, check out the SSH Academy
First generate the keys on your local machine.
1
ssh-keygen
Then copy them to the remote Raspberry Pi.
1
ssh-copy-id pi@192.168.3.14
If you already have SSH keys on your computer, they can be used. This is not always recommended for security reasons. Determine if you have existing keys by navigating to
~/.sshand looking forid_rsaandid_rsa.pubfiles.
Now when attempting SSH access with ssh pi@192.168.3.14 you should automatically be logged in. No password required.
If SSH keys were used previously but need to be updated, you may need to remove the previous keys before the new ones will work. Run
ssh-keygen -R 192.168.3.14to clear out any previously linked keys.
Key access with a trusted device has now been configured for the remote Raspberry Pi. However, you are still able to log in via any device by using the basic password authentication method. In order to only allow devices with a key to access the Pi, we need to make a few changes to the Raspberry Pi SSH configuration.
The following steps will disable password based SSH access to your remote Raspberry Pi. You will only be able to access the remote device from a device with an established SSH key or locally. Make sure you have verified at least one device can SSH to the Pi via key based authentication before proceeding.
To complete these steps, SSH into the Pi.
1
ssh pi@192.168.3.14
Then open the SSH configuration file for editing with your preferred editor.
1
sudo nano /etc/ssh/sshd_config
Navigate down to the lines regarding password authentication. They should read as follows:
1
2
3
# To disable tunneled clear text passwords, change to no here!
#PasswordAuthentication yes
#PermitEmptyPasswords no
And modify it by uncommenting the password authentication line and changing it to no.
1
2
3
# To disable tunneled clear text passwords, change to no here!
PasswordAuthentication no
#PermitEmptyPasswords no
Save and write out the changes, then reboot the Pi. Next time you go to log in, only a machine with the authorized key will be able to access the remote Pi. Even the correct password will not grant access.
Configuring the Pi
Raspberry Pi has a built in command line configuration tool that provides a simple way to dial in options. Before we get too far we need to make sure the system is up to date. Log into your Pi’s terminal and run the update sequence.
1
sudo apt update && sudo apt full-upgrade -y
This will update the package repository of the Pi and automatically apply any upgrades. On a freshly flashed OS it should not take terribly long.
It is recommended to run this update command prior to installing any new packages or software to your device.
raspi-config
With the Pi up to date, open the configuration tool.
1
sudo raspi-config
Take a moment to navigate through the menus and adjust the settings as needed for your deployment. I provided a brief list of some of the common adjustments I make and what they do. Some of these may have been enabled and set if you used the “Advanced options” tool in Raspberry Pi Imager.
- System Options
- Wireless LAN - If using WiFi
- Password - Changes the password for the default (pi) user
- Hostname - Changes the network hostname
- Boot/Auto Login - Needs to be set for desktop if using VNC
- Display Options
- Resolution - May need to be adjusted for VNC
- Interface Options
- SSH - Allow SSH connections
- VNC - Allows VNC connection for remote desktop use
- SPI - Activate SPI module for the GPIO pins
- I2C - Activate I2C module for the GPIO pins
- Remote GPIO - Remote access to the GPIO pins
- Localization Options
- Locale - Sets local key inputs
- Timezone - Sets local clock
After any changes are made, reboot the system and your Pi is now fully baked.
Overclocking
While exploring raspi-config you may have noticed “Performance Options” are disabled in later model Raspberry Pis. However, we can still overclock the device by modifying the configuration directly.
Overclocking your device has the potential of causing irreversible damage. Do so at your own risk. At minimum, I recommend your Pi have some external cooling installed and a good power supply.
Start by evaluating the Pi’s current speed. The following command will display and refresh the speed every second.
1
watch -n 1 vcgencmd measure_clock arm
With an idea of the current speeds we can begin to consider overclocking. By default the Raspberry Pi 4 CPU is maxed at 1.5 GHz. I’ve read reports of the CPU being overclocked to 2.1 GHz and GPU to 750 MHz. On my 8GB Raspberry Pi 4B I ran a stable overclocked system with the CPU at 2.0 GHz and GPU at 600 MHz.
The following steps involve manually editing the Raspberry Pi configuration file.
Begin by opening the configuration file and navigating to the overclock section.
1
sudo nano /boot/config.txt
You should see something similar to below.
1
2
#uncomment to overclock the arm. 700 MHz is the default.
#arm_freq=800
From here you can increase the arm_freq (CPU speed) and add additional parameters for over_voltage and gpu_freq (GPU speed).
I only have experience overclocking the Raspberry Pi 4B and Raspberry Pi Zero. I found little to no success or gain when attempting to overclock a Raspberry Pi Zero.
The settings below are from my stable 8 GB Raspberry Pi 4B. There is no guarantee they will work »on your device.
Once you modify these parameters, save and write the changes then reboot the Pi. If you are unable to boot, it’s likely your system cannot support the clock speeds you attempted. It will require either a reflash of the OS or direct modification of the configuration from the SD card to fix.
Run the monitoring command again and start using the Pi. Now watch how the clock speeds have increased. You’ve officially overcooked your Pi.

